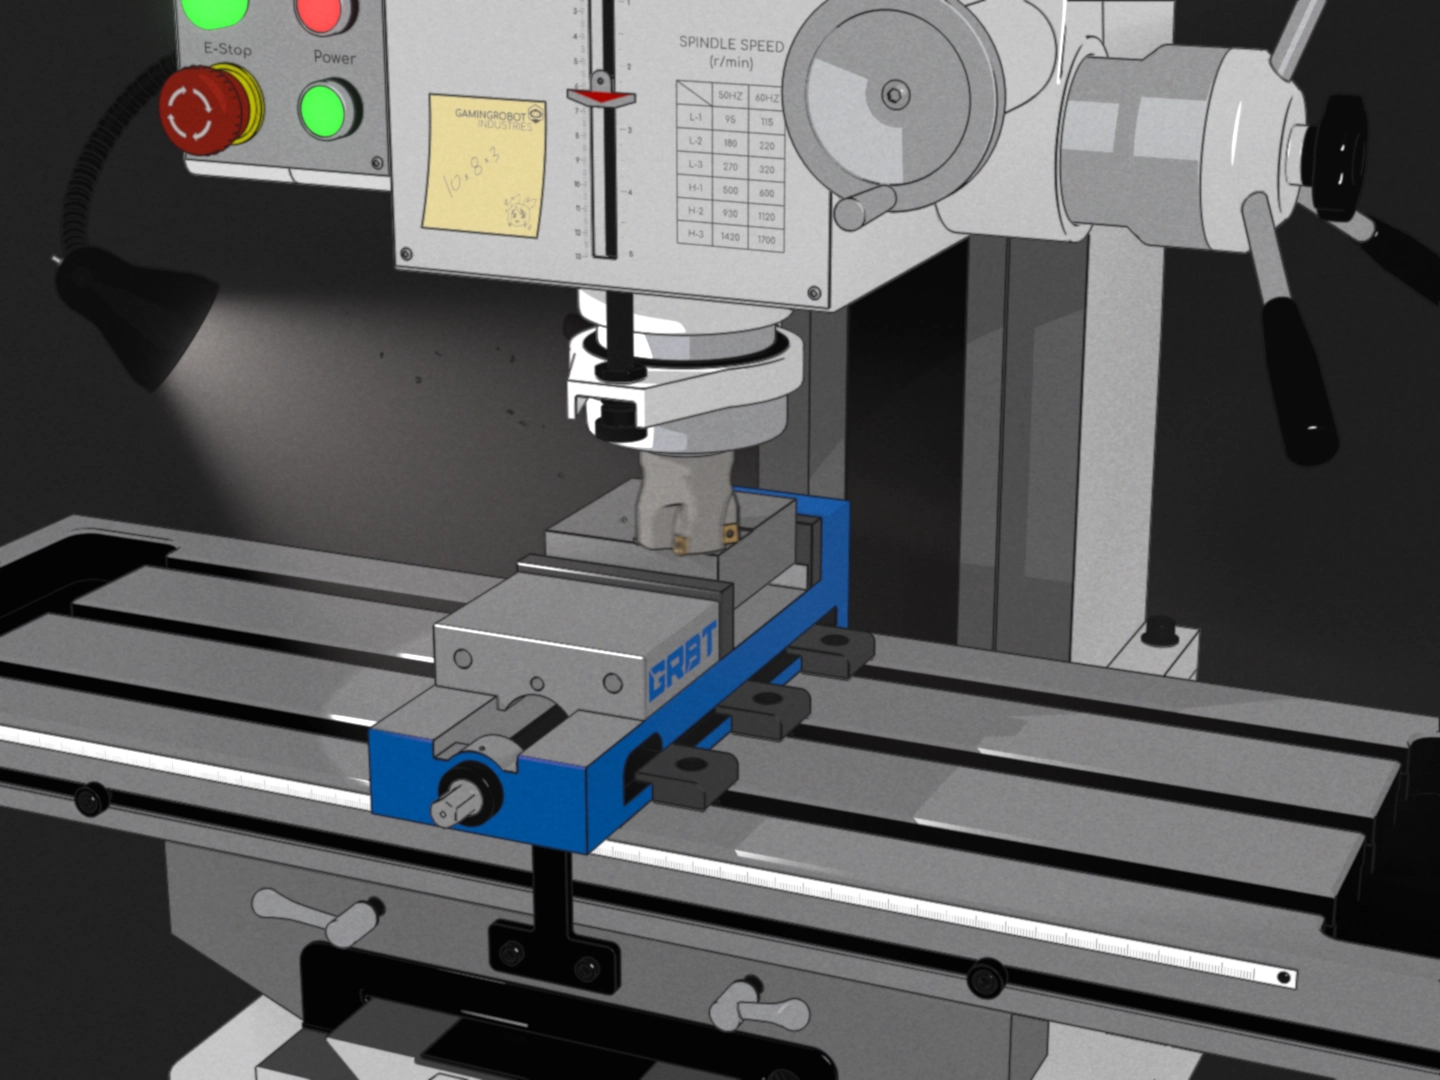
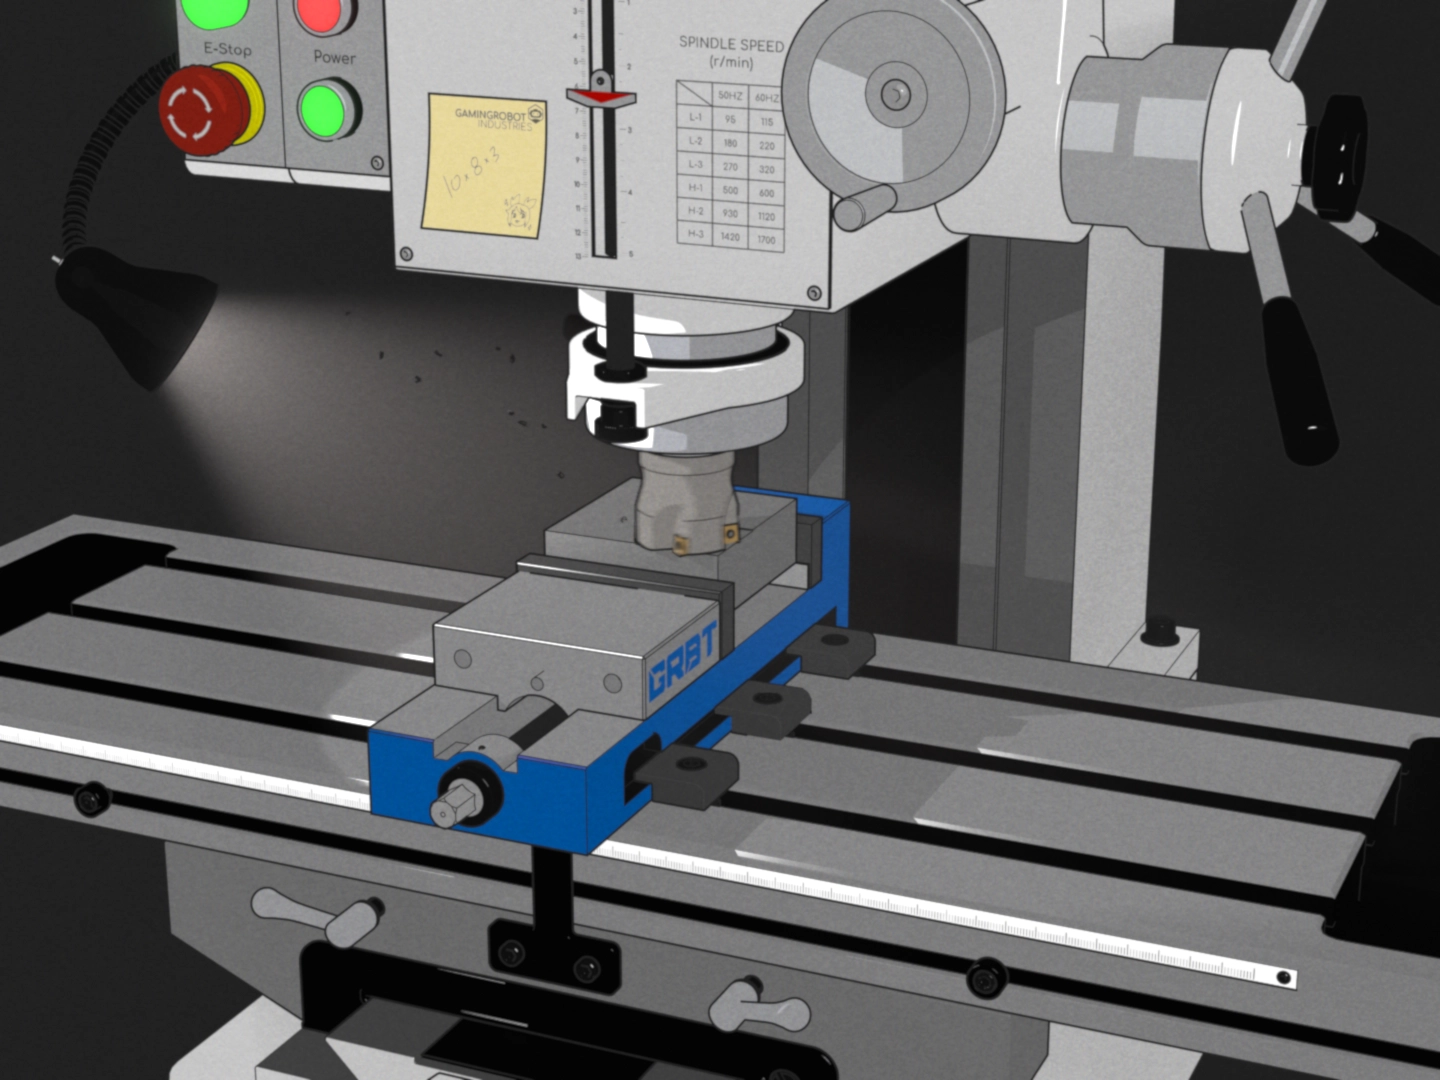
A breakdown for the stylized milling machine render.
Software🔗
- Rendered in Blender 4.5 using EEVEE
- Line art is rendered using Malt/Cider
- Grain was generated using Grainy
Update 2025: I used smear lines instead of motion blur using AutoSmear.
Light and Shadow🔗
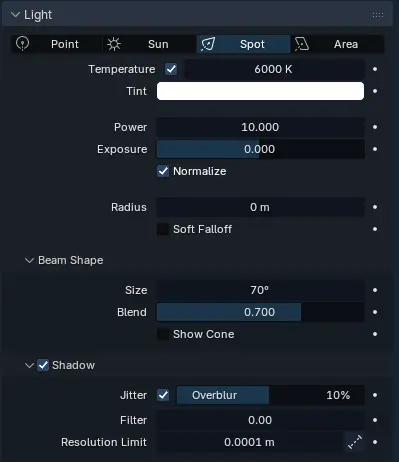
To get sharp shadows, I set the Shadow Step Count to 1 in Render -> Shadows. Then set these settings on lights in Light Settings -> Shadows:
- Enable Jitter with 10% Overblur
- Filter to 0.0
- Resolution Limit to 0.0001m
To disable background light emission, I disconnected the Background from the output in the World shader (or by setting the Strength to 0.0). This allows control of the exact color of the objects and shadows in the material shader.
Spot Lamp🔗
There is a spot lamp inside the mill's lamp illuminating the mill and the volumetric.
Sun Lamp🔗
The low-power sun lamp has a copy rotation constraint targeting the camera and has shadows disabled. This light also uses light linking to exclude some items from the light due to weird shading.
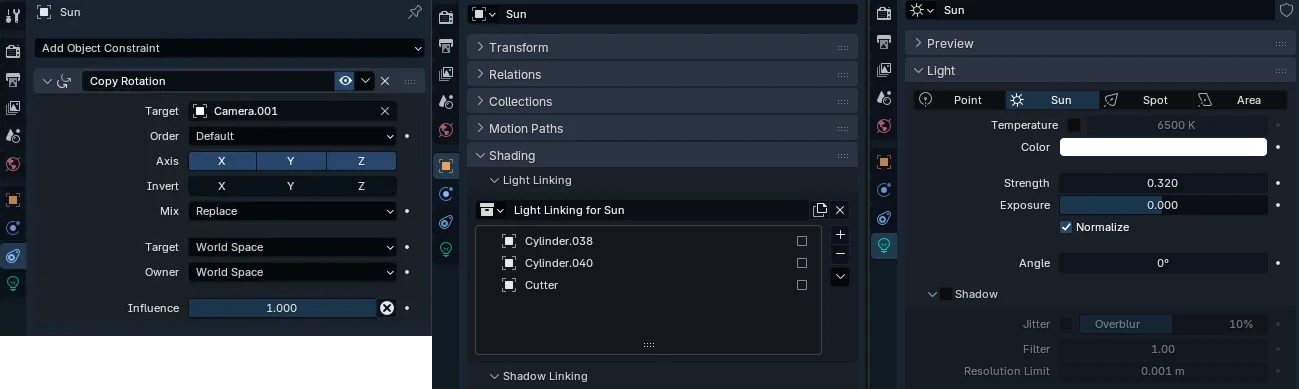
Since it is a low-powered light, it only gives highlights to areas outside the main spot lamp.

Materials🔗
I set the Color Management to Standard and added a Shader AOV for Bloom (Color) in the View Layer settings. The bloom is a separate AOV because everything in the scene is emissive, and I only want bloom on specific objects. A Cryptomatte Object pass would also work for this.

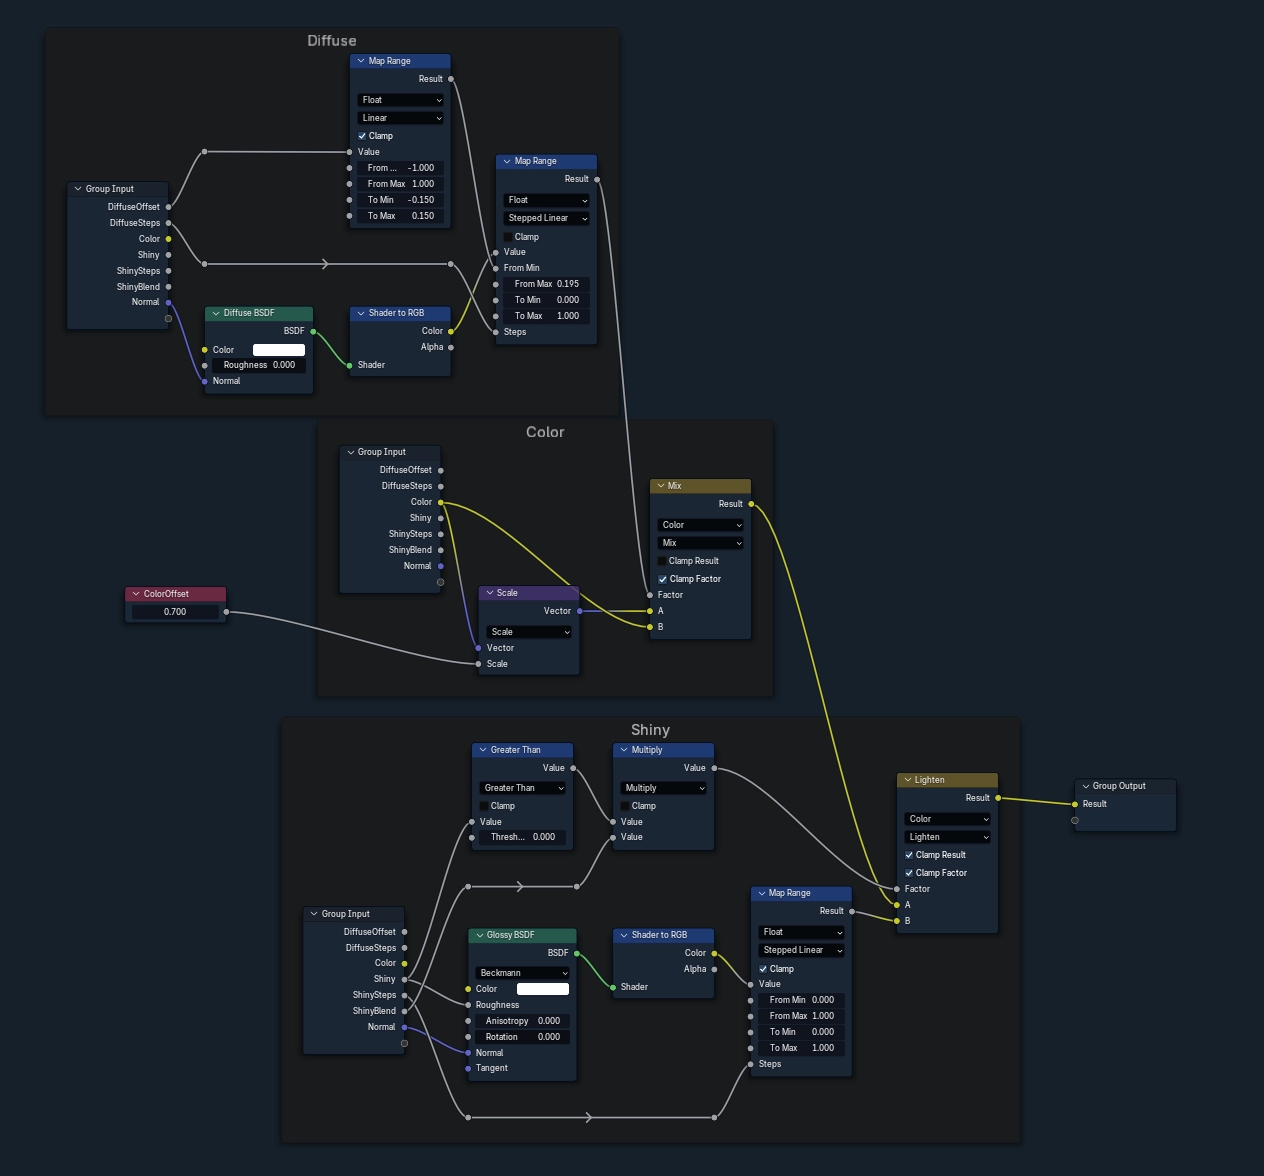
These are the nodes for the DiffuseColor node group. The ColorOffset value changes how dark the shadows/diffuse shading are (faking the background illumination without changing the main shader color).
Volumetrics🔗
The lamp volumetrics are set up on a separate view layer with the spot lamp, so the volumetric did not affect the lighting of the main scene. The mill was set to Holdout, so it didn't render the volumetric where the mill was.

Particles🔗
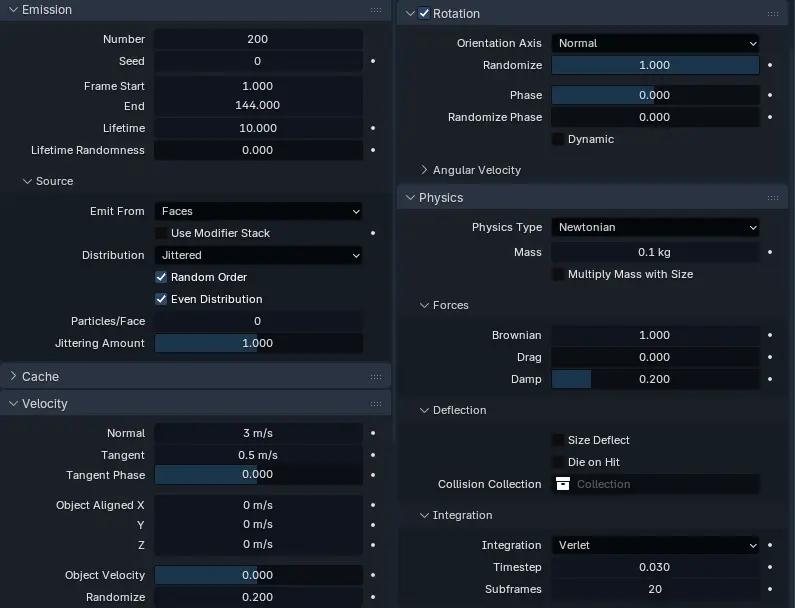
These are the settings I used for the swarf particle system. The swarf models were in a collection that was randomly selected. I had difficulty with getting the physics to be stable, so I set the scene gravity to half, set collision on the metal block, and baked the simulation before rendering.
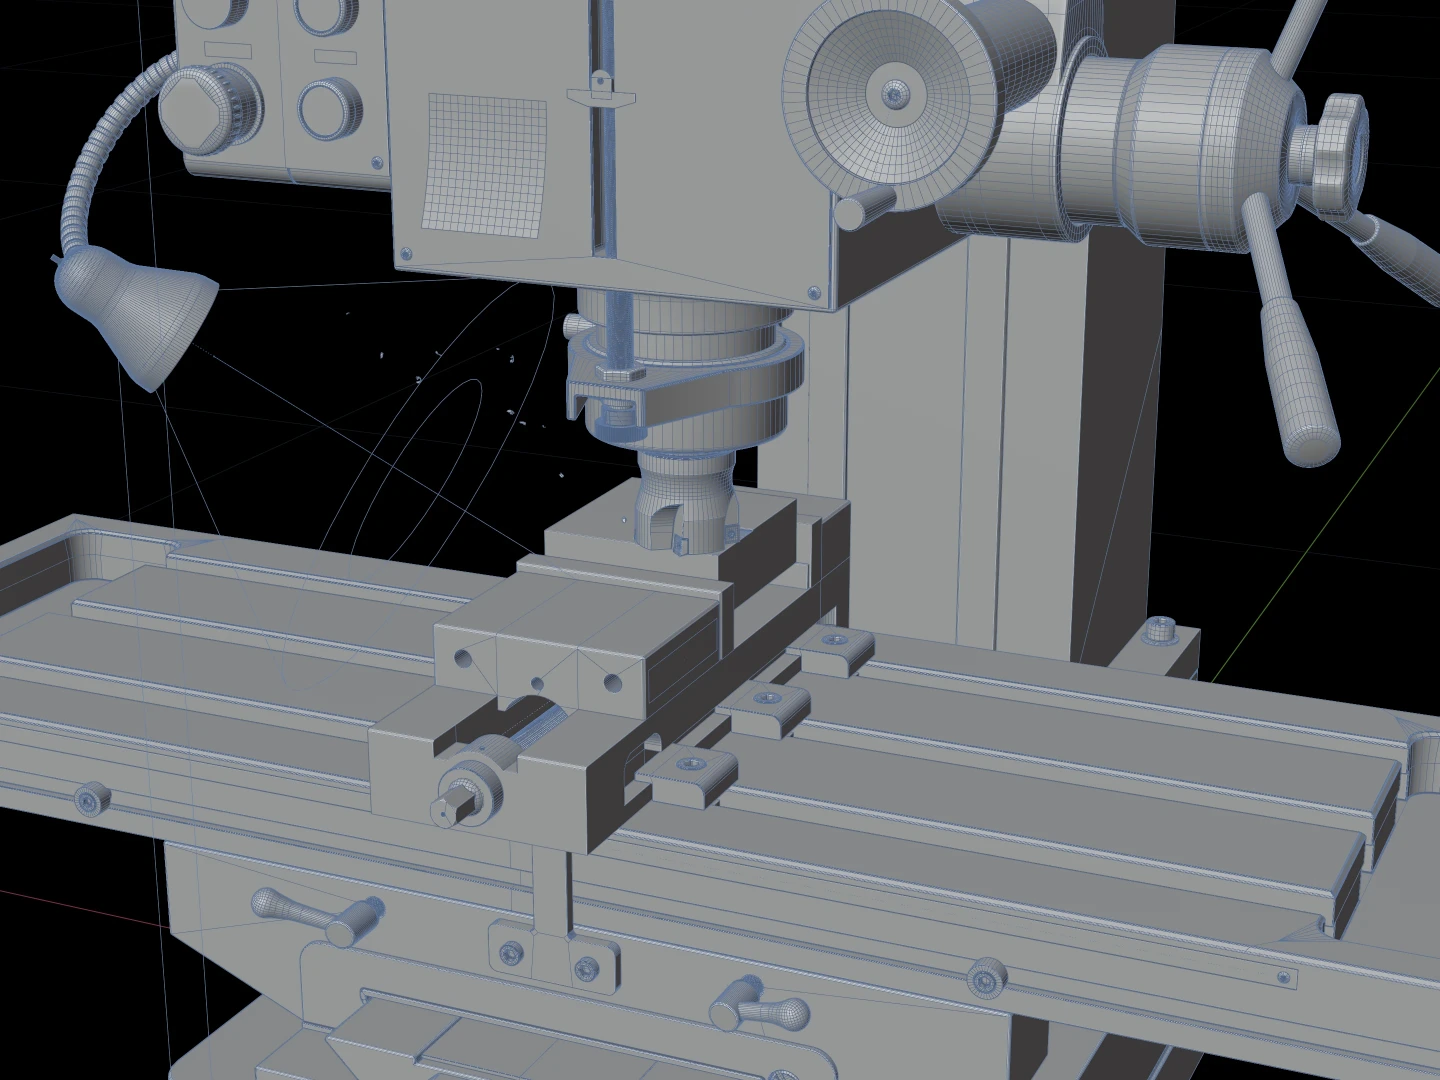
Line Art🔗
I tried a couple of different approaches for the line art.

Since I really liked how Malt's line art looked, I decided to go with that one. Malt is a custom render engine, so I had to use a linked scene since each scene can only have one render engine selected.
I used the default line width settings and set the Color to transparent. In the main Default Render node tree, I also set the background to transparent.

After this project I created Cider, which uses Malt but renders the line art alongside the main render so it can be used in compositing. It also makes it easier to set line art styles directly in the material settings and has support for a viewport preview. Cider is meant for just line art on top of an EEVEE or Cycles render, so Malt should still be used for more complex line art.
Compositing🔗
For compositing, I enabled transparency in Render -> Film -> Transparent since I had disabled the background in the World shader earlier. Then I can then composite in any color as the background.
I enabled additional passes in the View Layer settings:
- Z/Depth (for Vector Blur)
- Vector (for Vector Blur)
- Cryptomatte Object (to mask out specific objects for Vector Blur)
I had a weird issue with one frame in the middle of the render having a large vector change to the metal block in the vector pass but not in the combined pass. So I used the Cryptomatte Object pass to mask out the cutter to apply the Vector Blur to.

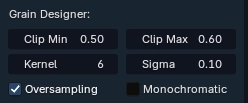
The settings I used for generating the grain with the Grainy addon:
If you liked this, you can find more of my art at gamingrobot.art.